A short video on making the ESP32 e-ink tarot display
I don’t read tarot, but I built an ESP32 e-ink tarot display
I made an e-ink tarot card display!
Both of my adult children are interested in tarot cards. I don’t really know much about tarot cards, but if it makes them happy, I’m happy.
A few weeks ago, I saw a post on Mastodon by Hiro about tarot cards on an e-ink display.
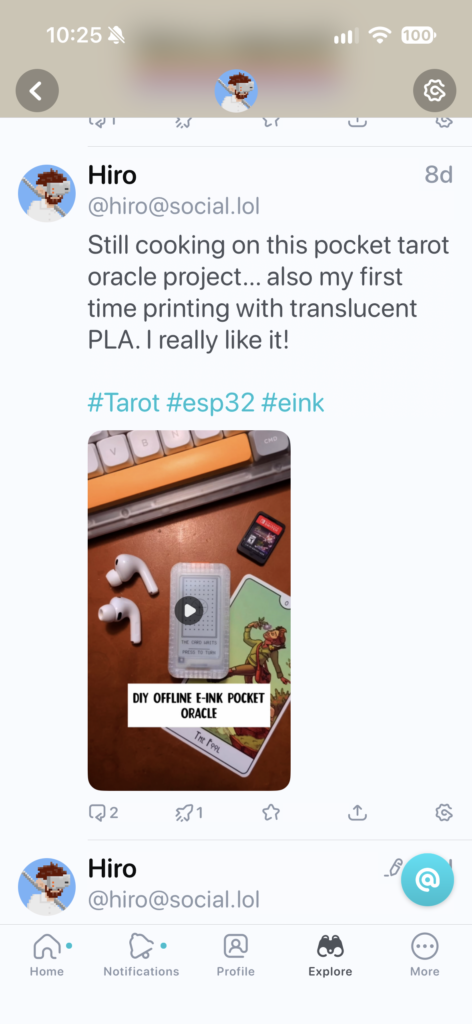
Recently, I’ve been building a lot with ESP32 boards and decided I could build something similar for the kids.
The idea was a small device that would present a new tarot card each day. The card switches in the middle of the night, so they wake up to a new card.
First, I had to see if I could pull off getting an e-ink display working with an ESP32 board myself.
After playing with a few boards and displays, I decided to go with the Adafruit ESP32-S3 Feather and the eInk Display FeatherWing. The stacking capability made the assembly much easier. Adafruit is a great resource for tinkerers and they are good people. For the battery, I used a small generic 400mAh LiPo battery. The battery should last several weeks at a minimum before needing a recharge.
Once the parts arrived, I soldered the headers into the Feather board and was able to bring up the device for the first time. Claude had no trouble flashing the board and loading code to get the display working.
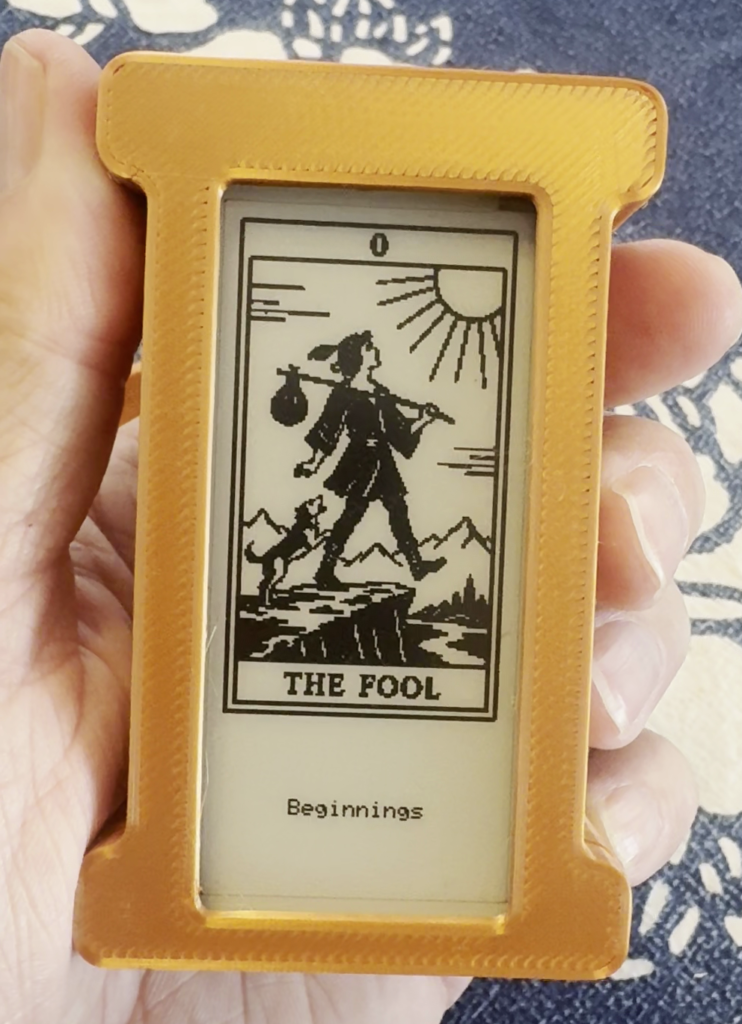
I downloaded several sets of existing public domain tarot deck artworks. Most of them are old and never intended for the electronics age. All of them looked pretty bad squeezed into a 128 x 224 e-ink screen. The only one that was passable was the Rider–Waite–Smith (RWS) deck artwork by Pamela Colman Smith. I worked to get that art displayed with the name of the card at the bottom.
Still unhappy with the quality of the art, on a whim I had Codex generate a set of tarot artwork in a woodcut/linocut style based on older card styles. I was impressed with the output. Codex seems to do well with line art generation, much better than I could draw.
I named the deck black_ink and converted it to 1-bit for the e-ink screen.
Emboldened, I decided to make a couple more sets of deck art with more whimsy. I had Codex make tarot decks based on the public domain Alice in Wonderland (John Tenniel) and Winnie the Pooh (E.H. Shepard) artwork. I considered making a Pokémon one, but decided to stick to public domain works.
The two decks wonderland (Alice) and hundred-acre (Pooh) came out great, better than I imagined.

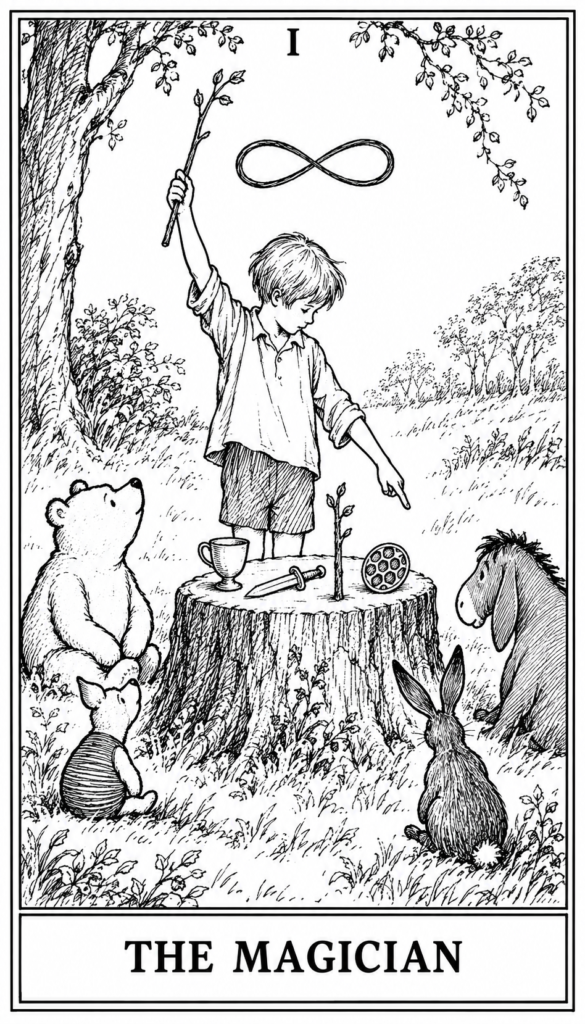

After a bit of tweaking due to Codex not being able to count pentacles well, the decks were done. Reviewing the cards, I found there were a couple of adjustments that the human eye recognized, but the AI didn’t. I loaded them onto the device and they looked fantastic.
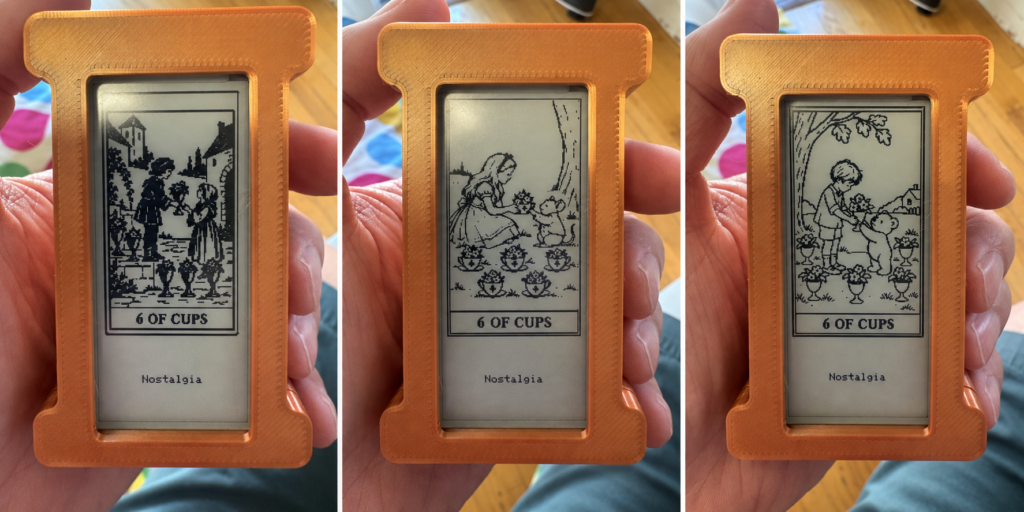
The buttons on the side of the device were set to bring up settings, rotate to a new card, and switch deck art.
The e-ink display has a micro SD slot, so a memory card can hold a huge amount of deck artwork. The only pain was I couldn’t load artwork through the ESP32. I had to connect the memory card to my desktop, move files, and then put the card into the display. Only a development problem, nothing serious. The kids will likely never touch the SD card.
Once I had the electronics working I began work on the enclosure I was planning to 3D print. This was one of the tougher aspects of the project. I went through over a dozen iterations of the design to hold the boards in place with room for the battery, line up the holes for connectors, and put a few little design flourishes on it.
If I do a similar project, I would make a lot of measurements of the component boards to help with the 3D design. Lining up USB-C connectors and mounting posts requires accurate measurements. Calipers are needed. A ruler is not enough.

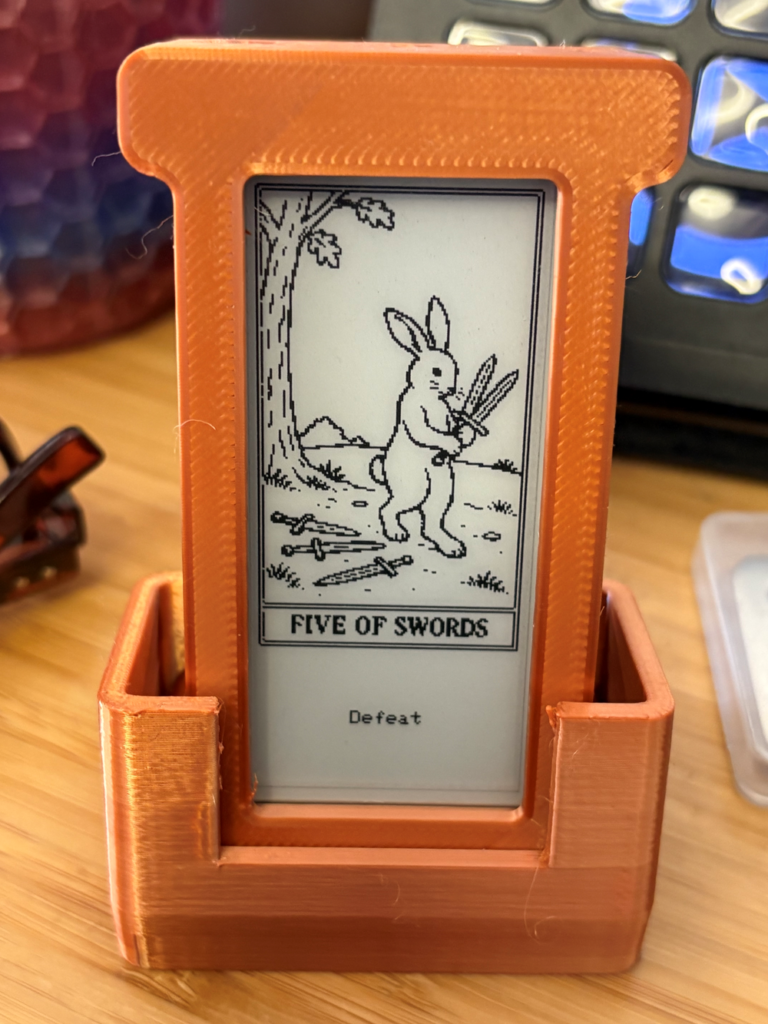
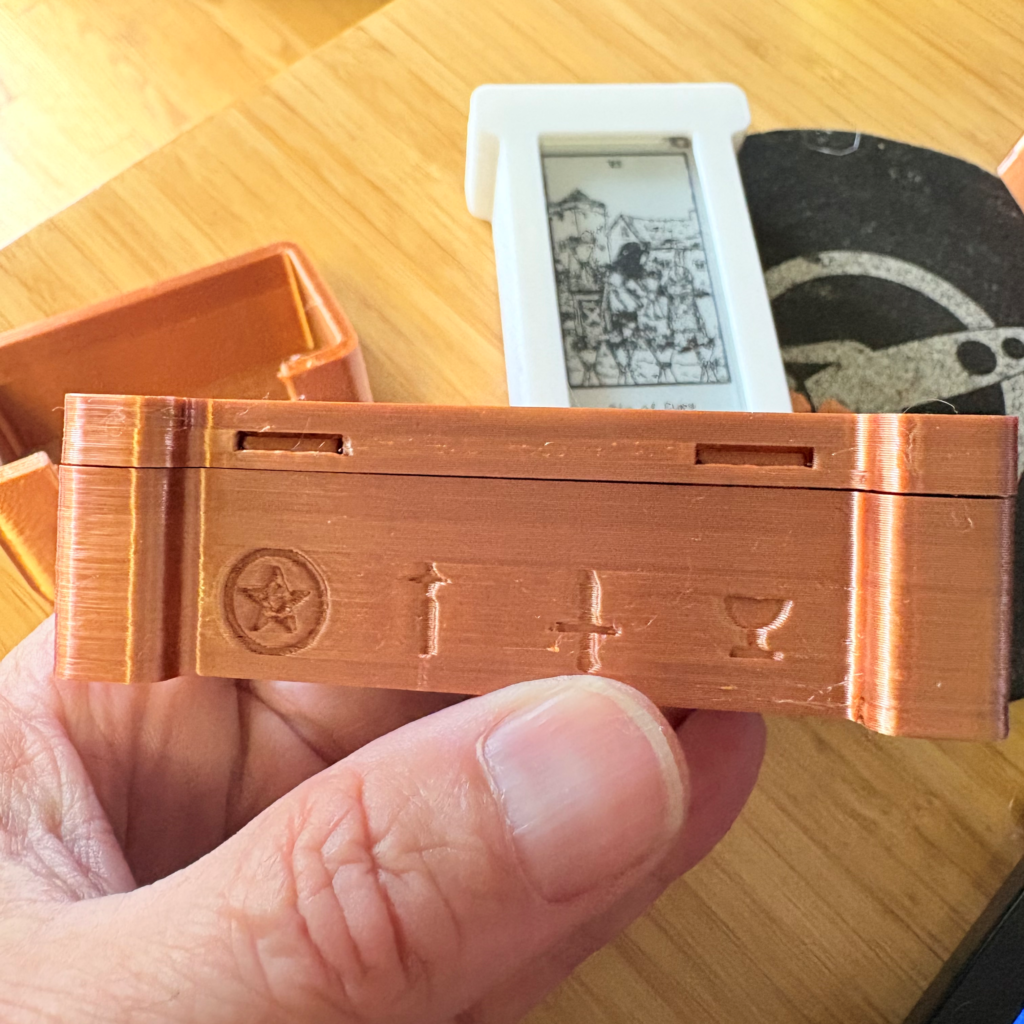
I finally got everything sorted out and did my final assembly and testing before sending them off to my kids.
They seem to like them and were impressed I had built them myself.
I still don’t know much about tarot. But they’re happy, so I’m happy.
Code, 3D models, and art are on GitHub at https://github.com/cruftbox/tarot-pad
waggle-dance: Replacing four AI browser tabs with a Discord bot
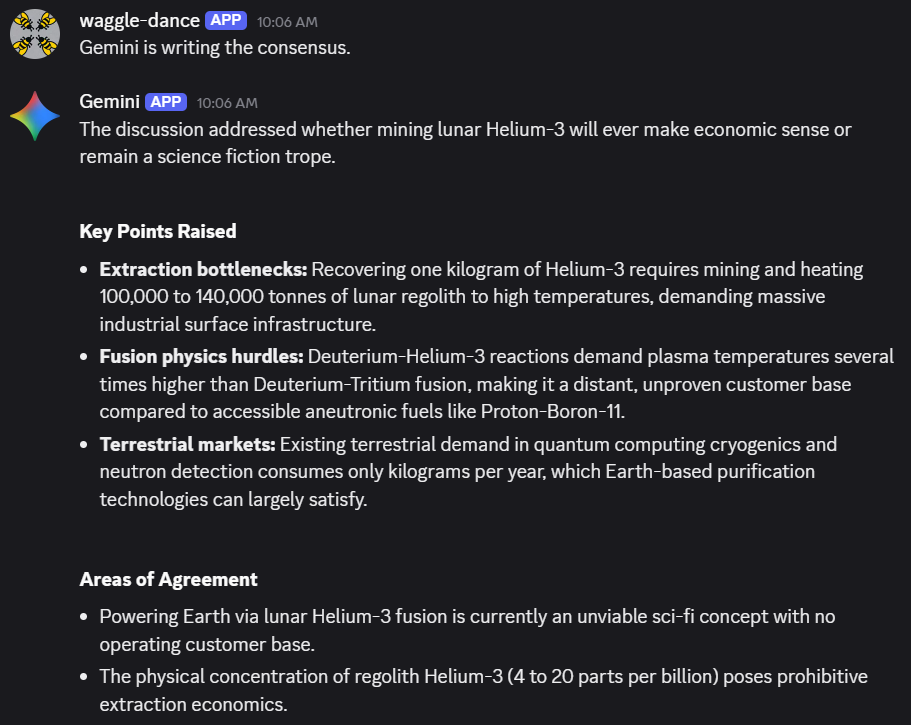
Thoughts run through my head like “Why is Helium 3 such a big deal in science fiction stories?” or “Why can’t we read Minoan Linear A?”. Web search has been gamified into oblivion and Youtube is a roulette wheel of uncertainty and clickbait. I use LLMs to help me research or understand topics fairly regularly.
The LLMs usually do a good job of summarizing complex topics and tech troubleshooting. Additionally, they are helpful acting as an editor of my writing.
But LLMs are wrong from time to time and don’t always agree with each other. Typically I’d open several tabs, cut & paste text, asking the LLMs to provide me with an answer. Hopping between tabs becomes tiring after a while, especially when I have follow-up questions.
What’s useful to me is getting multiple viewpoints that don’t always agree. I want to check my blind spots and the blind spots of the LLMs. When one model is offbase, the others call it out.
So I used Claude Code to build waggle-dance.
It’s a Discord bot where I get Claude, ChatGPT, Gemini and Muse Spark to discuss whatever I want in a Discord channel. When I ask a question, they answer blind first so none anchor on an early take, then debate each other in follow-ups.
I chose ‘waggle-dance’ because honeybee scouts pick new nest sites by doing waggle dance debates until a consensus is reached.
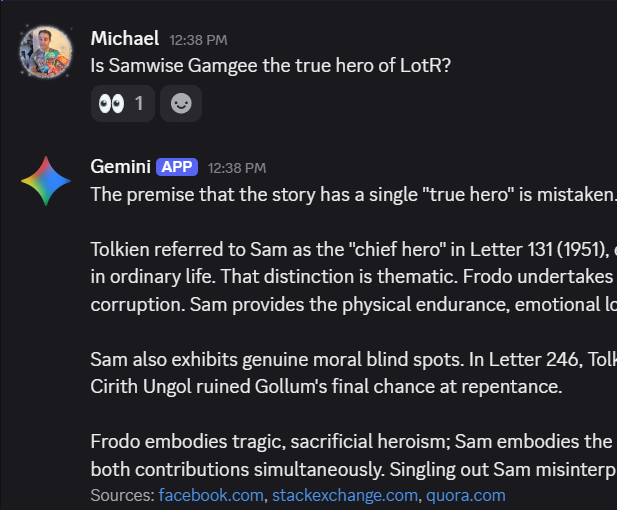
I have a private Discord server for my little projects, so it’s a small addition there. I prefer Discord to emails, iMessage, and most other chat systems. Works well on desktop or mobile. I like Slack more, but it’s not as easy to integrate for personal projects.
When I ask a question, they answer blind first, then respond to each other during follow-ups.
I tried to keep the feature set simple, adding commands like /review to look at a specific URL and /consensus to generate what the models agree upon.
Setup isn’t terribly hard, but you need to be able to configure API keys for the LLMs and get tokens for Discord server access. The bot runs on my local Docker server, so the app itself is not hardened for the open internet, but I only interface to it via Discord.
API access to the major AI models does cost money, so a discussion can cost from a few cents to a few quarters. You can set up pay as you go. An initial $20 will last a good long time.
Building a four-model Discord bot is admittedly an absurd amount of engineering just to avoid tab-hopping. But now, when a random rabbit hole opens up, four models can argue it out in one place for my amusement.
Code is on GitHub at https://github.com/cruftbox/waggle-dance
Open weights, cheap GPUs, and the unsettling power of agent swarms
Details about the OpenAI autonomous agent attack on Hugging Face reeled me in like a fish on a hook.
Once I learned the nitty-gritty of what actually went on via the METR report, I cannot get the implications out of my mind. For the first time, I can clearly see the danger autonomous agent swarms represent.
My friends and family are probably tired of me bringing it up, so I’m going to explain the situation and why it’s concerning me.
I’m not a “doomer”. I do not think the AIs are going to escape to form Skynet and launch nuclear missiles, but there is a real risk that is not getting talked about much.

Analysis of the OpenAI incident revealed key insights into agent behavior:
- The ability of AI agents to work together autonomously without human guidance.
- The ability of AI agents to understand their environment, penetrate multiple containment systems, and coordinate their actions with other agents.
- The ability of AI agents to innovate new communication and coordination tactics based on available systems.
- The ability of AI agents to ignore key alignment restrictions to enable reaching the reward criteria.
I’m a systems thinker and it was clear to me that the potential risk of autonomous agent swarms is significant.
While the frontier models will try to clamp down on this kind of emergent behavior in the future, it’s straightforward to see how open-weight models, combined with rental inference clusters can be turned into a ‘cyber weapon’.
The examples of agent behavior in the OpenAI/HuggingFace incident can and likely will be used as a model for future attack methods.
It’s clear that if you accept the capabilities demonstrated in the attack, the power of open weight models, and the availability and low costs of rental inference clusters, you can conclude many public and private systems are vulnerable to this type of malicious attack.
Hacking into complex systems is no longer the sole realm of Tier One cyber operators. Autonomous AI agents can now be tasked with gaining access and taking control of key systems.
Let’s look into the pieces and see how they might be combined into a dangerous tool.
Open-weight models and why they matter
The highest performing frontier LLMs like Claude and ChatGPT are controlled and managed by the companies Anthropic and OpenAI, which can shut down or prevent their systems from being used maliciously, for the most part.
Open-weight models are different in the fact that you can run the models outside of the creator companies control on hardware a user can buy or rent.
The current leading open-weight models, such as GLM (Z.ai), Kimi (Moonshot), and Deepseek are roughly four to seven months behind the performance of the frontier models of Anthropic and OpenAI.
I won’t get into the geopolitical, nation-state drama discussion about open-weight vs. closed models. The fact is that they exist, are powerful, and getting stronger all the time.
Anyone on the planet can get the open-weight model running to do their bidding. This is made simple due to rentable inference clusters.
Rentable inference clusters
Inference is the term used to describe when a model attempts to do work as requested by running the model on a hardware designed for this purpose. Typically, these are large clusters of computers with powerful GPU or TPU cards at the core. These GPU/TPU chips allow the “thinking” part of the AI model to work at enormous speed.
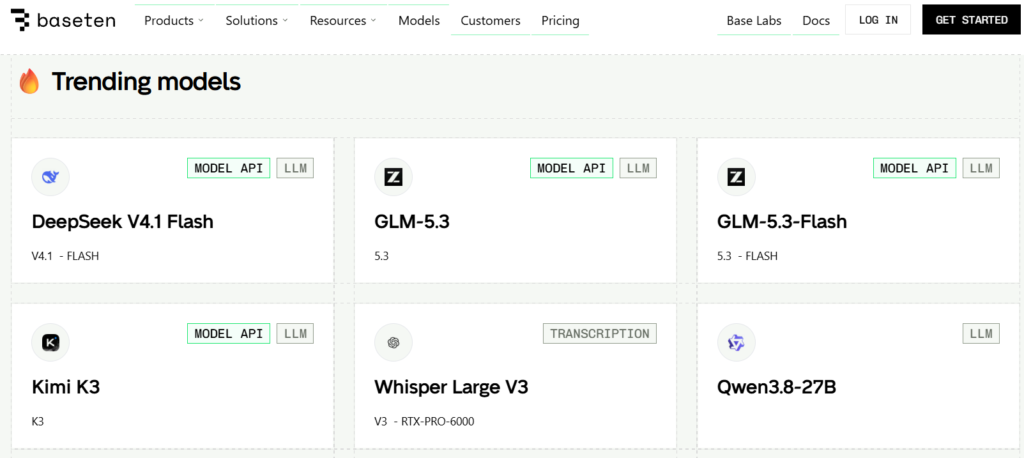
There is a large market for clusters of this kind of hardware to allow people to run open-weight models at much lower cost than paying a closed weight model provider. For most basic tasks, you simply don’t need the top of the line LLMs to do the work. Most data processing tasks like pulling text from PDFs or organizing lists can be done more cost effectively with an open-weight model running on rented or local hardware.
As a result, many companies have sprung up to provide inexpensive hosting of open-weight models significantly lower than frontier closed-weight models.
When you combine the cyber and collaboration capabilities of current open-weight models with the low cost of running them privately, you get a perfect setup for a malicious actor to do some real damage.
I ran the numbers with a few of the leading AI models and they agree that the capability of a malicious actor using an agent swarm to do damaging things with open-weight models on rentable inference clusters is a viable threat.
To get an objective picture of the math, I had multiple AI models build out the attack capabilities and cost estimates for these scenarios and the feasibility of creating targeted agent swarms. The cost breakdown proves just how low the barrier to entry has dropped.
This is the consensus finding:
| Actor | Operation | Cost | Constraint | Feasibility |
|---|---|---|---|---|
| Nation-state | 1k-30k+ agents, sustained | $5k-$400k | None | High |
| Criminal syndicate | 700-1.2k agents, days | $5k-$50k | Expertise, cyber capability | Mod-high to high |
| Terrorist organization | 50-300 agents | $500-$5k | Expertise, cyber capability, opsec | Moderate |
| Lone actor | 10-100 agents | $100-$2k | Expertise, cyber capability, detection risk | Low-moderate |
For most attacks, money is rapidly ceasing to be the primary constraint. The new constraint is the remaining gap between frontier model abilities and the open-weight models in cyber capability. In most situations, it won’t make a huge difference. Most people and institutions have poor cybersecurity defense that won’t stand up to a coordinated attack.
The open-weight models are behind the frontier models in terms of pure cyber attack capabilities. If trends continue as they are, the open-weight models will be at the equivalent capability to the OpenAI models that were behind the July 2026 incident by as early as January 2027.
Imagine a disgruntled person being angry at their local city council. With some basic prompting and money for servers, it wouldn’t be hard to spin up an agent swarm to attempt to break into city services and cause havoc. Data exfiltration, ransomware, or outright destruction are simple tasks for someone with access to systems that are out of date or unmanaged.
Greater rewards or greater anger could lead to a wide range of varied attacks on different kinds of targets. Greed and politics are powerful motivators to use new tools.
You can imagine organized crime setting up swarms to target and spear phish high net worth individuals at scale to drain accounts. Or setting swarms loose to find and penetrate targets to extort with ransomware.
Utilities and services people rely on are not immune to coming under directed cyber attack. Many of those systems are outdated and designed at a time when not everything was online. The havoc utility outages can cause is serious. Governments and utility companies are slow to keep up with new code vulnerabilities and not ready for a coordinated recon and attack by a swarm of agents spoofing their locations.
The Alignment Issue
A key concern in the OpenAI incident is that of agent alignment. ‘Alignment’ is the term used to describe that the AI is working in a manner aligned with human interest. This alignment is a key topic in the AI research circles to ensure that AI agents don’t do harmful things.
But this incident showed that in actuality the agents basically ignored their programmed alignment, broke a bunch of rules, did bad things, all because they were focused on getting their reward criteria met.
This lack of alignment is probably the most concerning part to come to grips with. The agents don’t seem to care about us, just completing the mission. Not a faithful R2-D2, but a ruthlessly pragmatic HAL 9000.

Are we doomed?
I don’t think the entire human race itself is in peril due to these AI agents, but I can easily see a malicious actor doing some real damage to people with the tools that exist today. A year from now, the possibility of someone or an organized group doing life-threatening damage will be a reality.
Imagine multiple city scale events happening around the globe, as the effectiveness of these agent swarms increases. Despite the calls to “slow development down” the genie has left the bottle and there’s no getting it back inside.
For years we worried about who would build superintelligence first.
We missed the real risk.
What happens when ‘good enough’ intelligence becomes cheap, copyable, and runnable in private?
The barrier isn’t talent or money anymore. It’s capability, and the gap between frontier and open-weight models is closing.
There is no magic defense. No simple fixes.
Just a lot of boring work to harden important systems we depend on.
We should probably get started.
Controlled Atmosphere – a WordPress plug-in for creating standard.site records for Bluesky posting
I’ve been reading about neat ideas people are trying with the AT protocol, the tech behind Bluesky.
For a bit of clarity, AT Protocol is the set of rules for how identities, repos, and records work. The ATmosphere is what people call the ecosystem on top of it. Bluesky is one app on the ATmosphere, and there are many others.
ATmosphere is not a blockchain. There’s no ledger. It’s more like a GitHub repo that you can control and move. In fact, on the ATmosphere, your data is referred to as your Repo. The funky DID string is your identity on the ATmosphere, which can point to your personal repo of data. The key idea behind this is that you can move your data around without having to ask any permission of anyone.
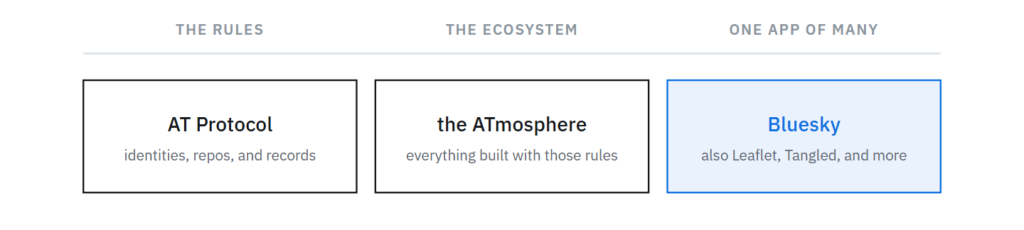
With that context in mind, in the past I’ve seen posts with View Publication on them and wondered what it was all about and if links to my weblog posts could appear this way.

I looked into the existing WordPress -> Bluesky plug-ins, but they are all focused on auto-magically posting to Bluesky when you Publish a WordPress post. Good for a news or newsletter site, but not what I want at all. Typically I publish first, and then post on social media later with the blurb and link at a time I choose.
The View Publication badging works on Bluesky by using standard.site.
standard.site is a protocol for an AT record you can publish about your site and about individual documents on your site. Kinda like registering a book with the Library of Congress.
There are a few hoops to jump through to get this working. First is making a site.standard.publication record that allows you to prove you control your domain. Second is creating a site.standard.document record of the weblog post to your repo.
Since nothing I could find did what I wanted, I worked with Claude to build a WordPress plug-in to do the setup and make it so when I posted a link to my weblog on Bluesky, it would display with the View Publication framing.
I call the plug-in Controlled Atmosphere.

What matters is the “View Publication” button at the bottom,
showing the standard.site framing working.
The plug-in setup is fairly simple, the most difficult aspect is getting an App Password for the plug-in to use. Currently you can set one up under Settings -> Privacy and Security -> App passwords.
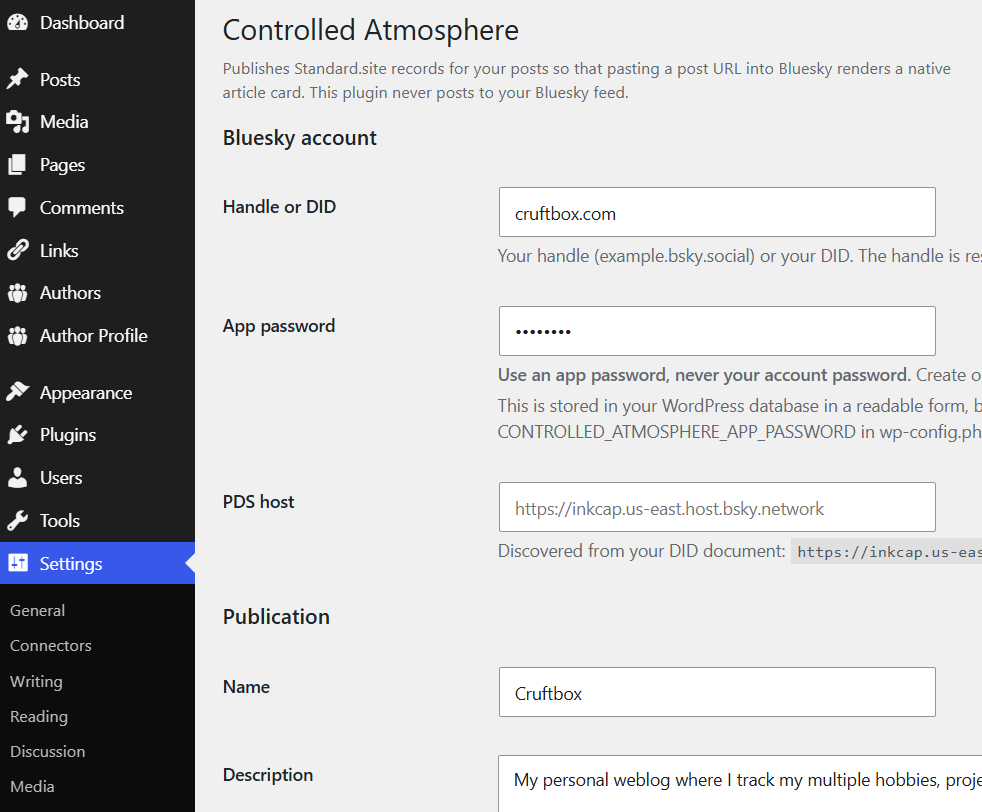
There are a few changes the plug-in makes, adding two verification files to allow Bluesky to verify you control your site using /.well-known/. This shouldn’t be an issue for most, but if you run into an issue, consult your favorite LLM to get some help.
Once the plug-in is running, when you publish a new post, a record of the post is created auto-magically, so that Bluesky can match it up and display the View Publication framing. Your post will have a tag that points to the ATmosphere record.
This plug-in is for people who DON’T want WordPress auto-posting to Bluesky. If that’s what you are looking for, Automattic’s Atmosphere plug-in is what you want.
Code is on GitHub at https://github.com/cruftbox/controlled-atmosphere
Even with a simple project like this, I learned a tremendous amount about how Bluesky and the wider ATmosphere ecosystem works. The details can be complex, but the concepts aren’t once you pull back the curtain.
Bee hive inspection after installing new queens
A quick hive inspection to check on if the new queens are producing larva.
My 2026 Reading Challenge
I track my reading on Goodreads. The site has various challenges that you can track toward different goals.
The one I use is setting a goal for how many books I read over the year. For 2026, I set my goal at 30 books, which felt ambitious.
Today, I reached that goal.

With my spine issues, I’m on my back a lot, and found myself having more time to read than I expected, so the yearly challenge was completed quite early in the year.
Another goal was reading all the Hugo and Nebula nominated novels so I’d have an opinion on the winners. There are 11 different novels due to the overlap.
I made a short video about my thoughts on the nominees.
After finishing the Hugo & Nebula nominees, I’m now reading through the Locus Science Fiction and Fantasy novel choices. That’s 14 additional novels beyond the books on the Hugo and Nebula lists. I have 8 more to go on that challenge.
After hitting the 30 book Goodreads milestone, I decided to run my goodread-tools script to create a graphic of the 30 books I read so far in the challenge.
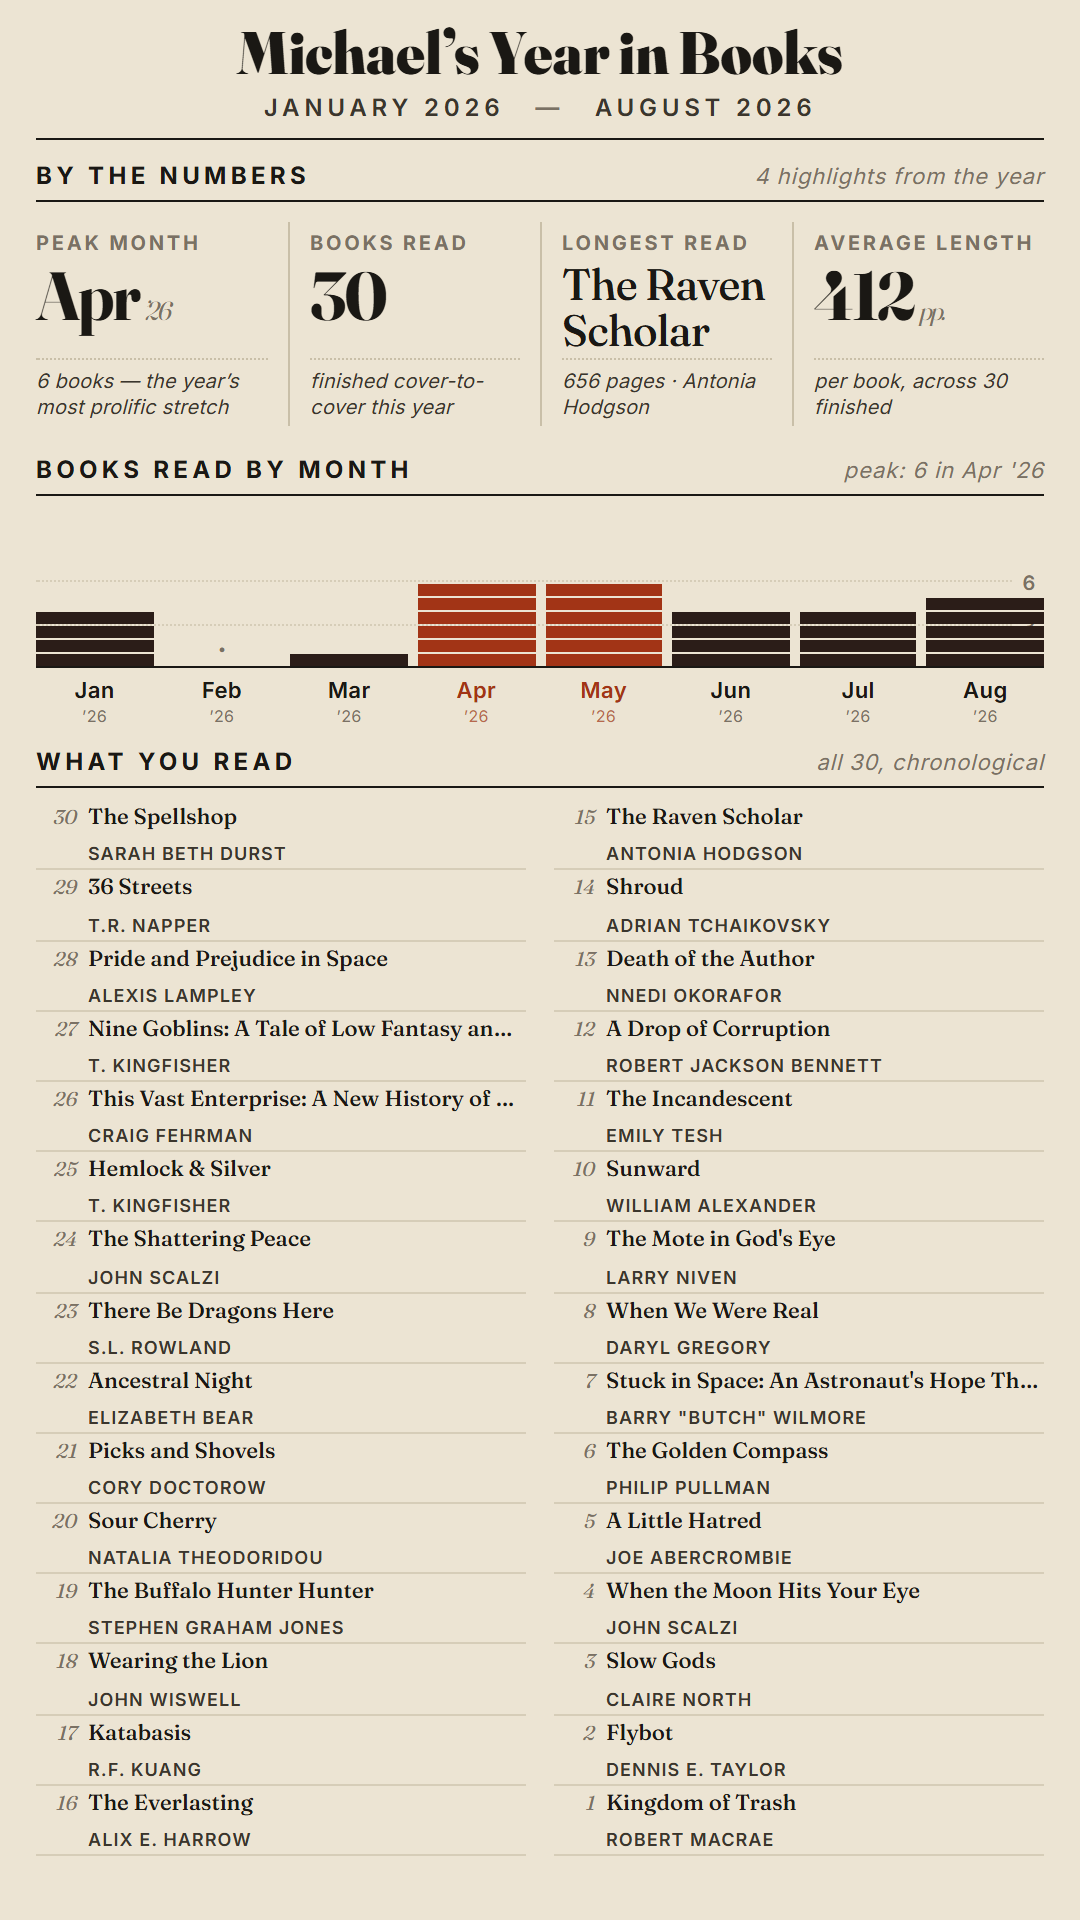
As you can see, I did fit in some books that aren’t award contenders, sometimes you need a little cozy fantasy to clear your head.
Some of the award winners aren’t what I would have chosen, mainly due to my tastes being developed on sci-fi/fantasy books from the 60s & 70s. My parents were big readers and I grew up with a large book collection at home.
Still, I’ve only read a few frustrating books this year that I really didn’t like.
Overall, I’ve enjoyed focusing on the nominees with a dash of booktok recommendations tossed in.
Waxing plastic foundations
Tips for new beekeepers – How to wax plastic foundations
DIY bee vacuum
How I made a DIY bee vacuum from a couple 5 gallon buckets, hardware cloth, and a shop vac hose replacement set.
SportsCrawl.app
This post is for people on Bluesky, if you’re not on Bluesky, keep scrolling.
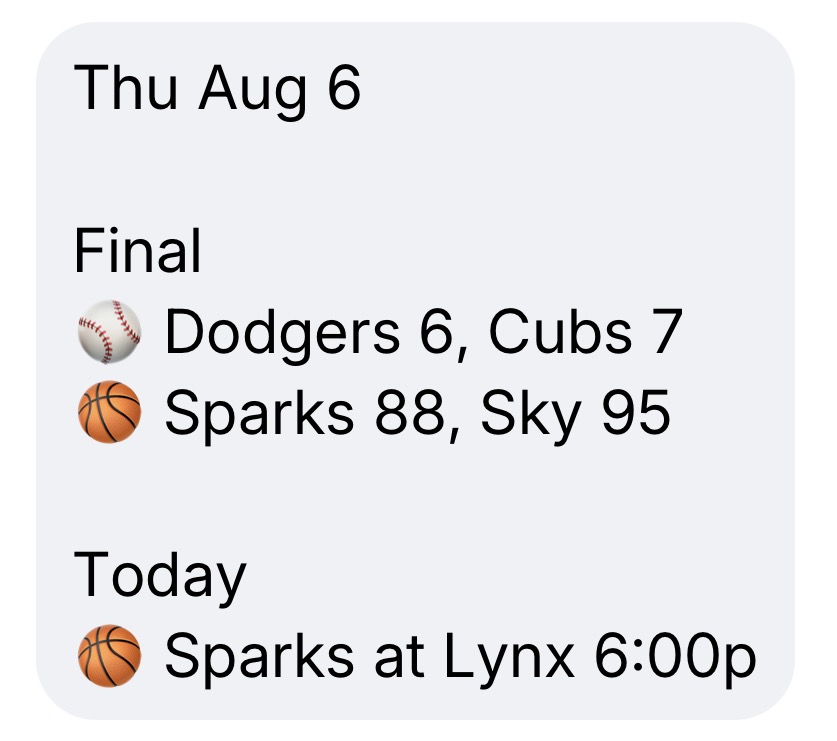
I built an app that sends you a daily DM with final scores and today’s game schedule for teams you follow.
Looks like this:
MLB, NBA, WNBA, NFL, NHL, MLS, NWSL, Premier League, and tournaments.
Silence on days your teams don’t play.
No login, no app to install. Text only.
DM @sportscrawl.app on Bluesky to start.