Like many people, I played around with Meta’s Muse for a bit. I’m not letting AI into my email or allowing them to buy things for me. Besides some price checking, there wasn’t a lot I wanted to use Muse for on the regular.
I was interested when I saw that Meta released an SDK for ESP32. I’ve been playing with ESP32 a lot recently.
Next I saw an ad for a Muse gadget that was obviously built on an ESP32 board.
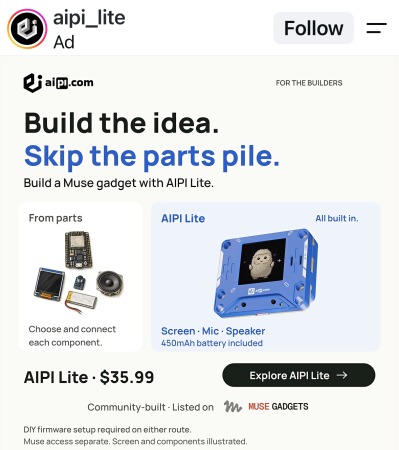
I said to myself, “I can build that,” and so I did.
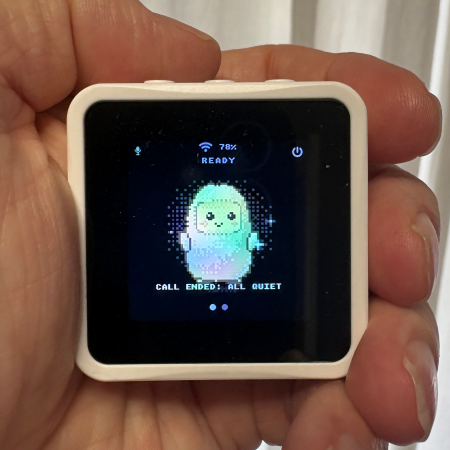
I started with a display device from Waveshare. They make a lot of good hobbyist hardware for great prices. Besides the display, it has a touchscreen, microphone, and a speaker. Importantly, it cost under $20, which is amazingly reasonable.
Powering it up for the first time, I saw it already had firmware loaded. I didn’t want to run that. Trusting Chinese firmware these days is a risky proposition with proxy gateways being installed on IoT devices. I backed up the firmware just in case.
The Muse SDK provides most of the capabilities, so I flashed the firmware into the device. Working with Codex, we configured the firmware to understand the device it was installed into in terms of screen size, display orientation, buttons, touchscreen, microphone, and speaker. The defaults didn’t match up correctly.
To connect to Muse, the device requires a token to pair with the Muse app. So the next step was getting an SDK token onto the device. Since the device is connected via USB to a computer for the firmware flash, the token is pushed to the device to be stored.
Once the token was installed, I enabled Developer mode in the Muse app. I opened Devices, tapped +, selected MuseGadget, and boom, it was connected. The app helped with setting up the wifi connection. Once the device is added, it can talk directly to the Muse servers and doesn’t need the app.
While the SDK does have code for audio input, we did need to install Waveshare-specific hardware support into the Muse firmware to get the mic and push-to-talk button working.
At this point, the device could capture a voice note, send it to Muse, and then display a text response. While this is impressive, I wanted more. I wanted the device to speak back to me. Unfortunately, Muse does not provide a specific service to turn the response text into speech.
After considering a few options, I decided to use Meta’s wit.ai to do the text-to-speech conversion. You use your Meta account to log into wit.ai and create a client access token. The only hard bit is getting the wit.ai token onto the device. To enter the token, you copy the client token from the wit.ai site. Then in the Sound menu you select Configure wit.ai token. You then open the IP address the device shows. That opens a page where you can paste the token into. Select Save and test.
After that, I could ask a question of the Muse device and it would respond audibly.
The audio quality isn’t great. It’s a tiny speaker playing out of a $20 device. But it’s enough to hear an answer.
Throughout this process there were multiple issues Codex and I ran into: display orientation, managing the limited ESP32 memory, and making the setup process manageable. The LLM helped a lot but could go down a rabbit hole when solving a problem. Several times I had to stop it and reorient. Getting the LLM to stop and review logs helped the most in solving issues.
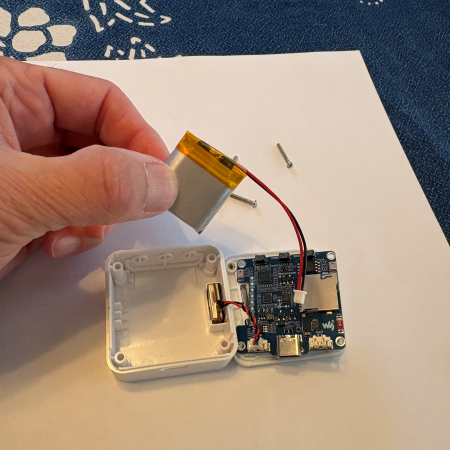
At this point, I was happy and thought the project was done. I unplugged the device and … it turned off. After opening the case, I realized I had ordered the version without a battery. A couple of days later, a $6 400 mAh LiPo battery arrived and the Muse gadget became truly portable.
Requests made on the device do show up immediately in the Muse app and web interface. So you can ask Muse to research something and then review the results later.
Did I save a bunch of money by building the Muse gadget myself? Probably not.
But it was fun to do!
Code is on GitHub at https://github.com/cruftbox/muse-gadget