We have had a PurpleAir PA-II on our back porch for years. It works fine. The problem is that checking it requires going online to look at a map to find ours.
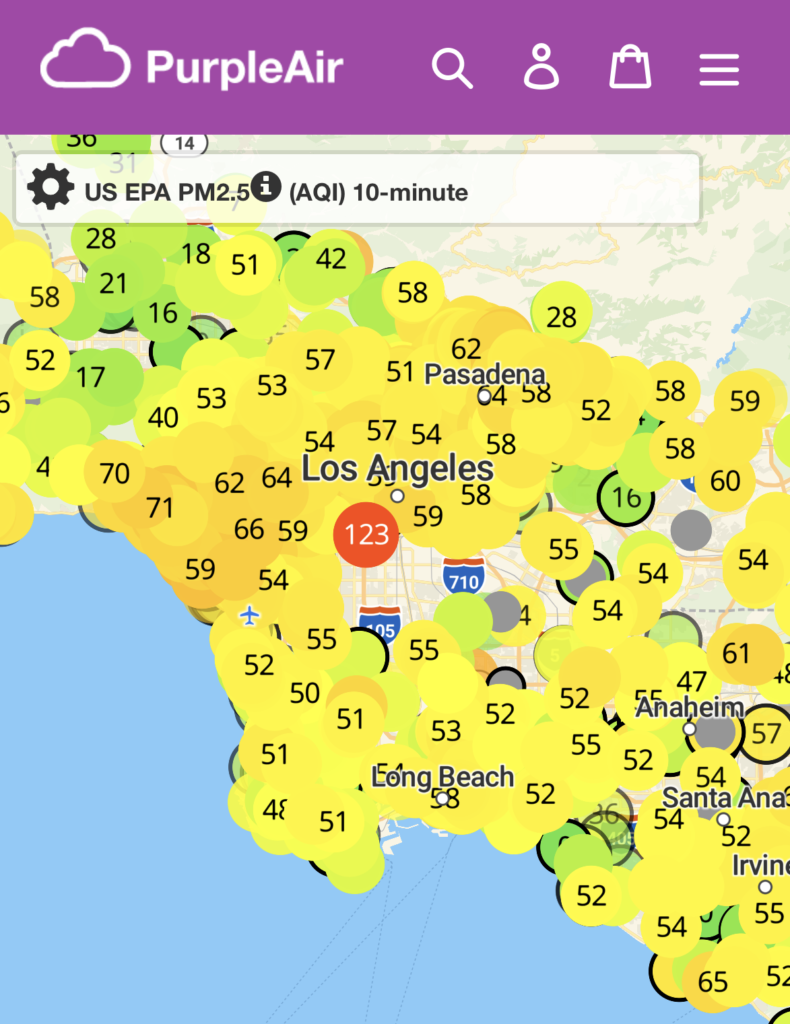
What I wanted was a small device that is green when the air is fine and turns other colors when it’s worse. Here in LA between smog, wildfires, structure fires, and fireworks, the air quality is all over the place.
No specific numbers needed, just a color that gives us a good sense of what’s in the air.
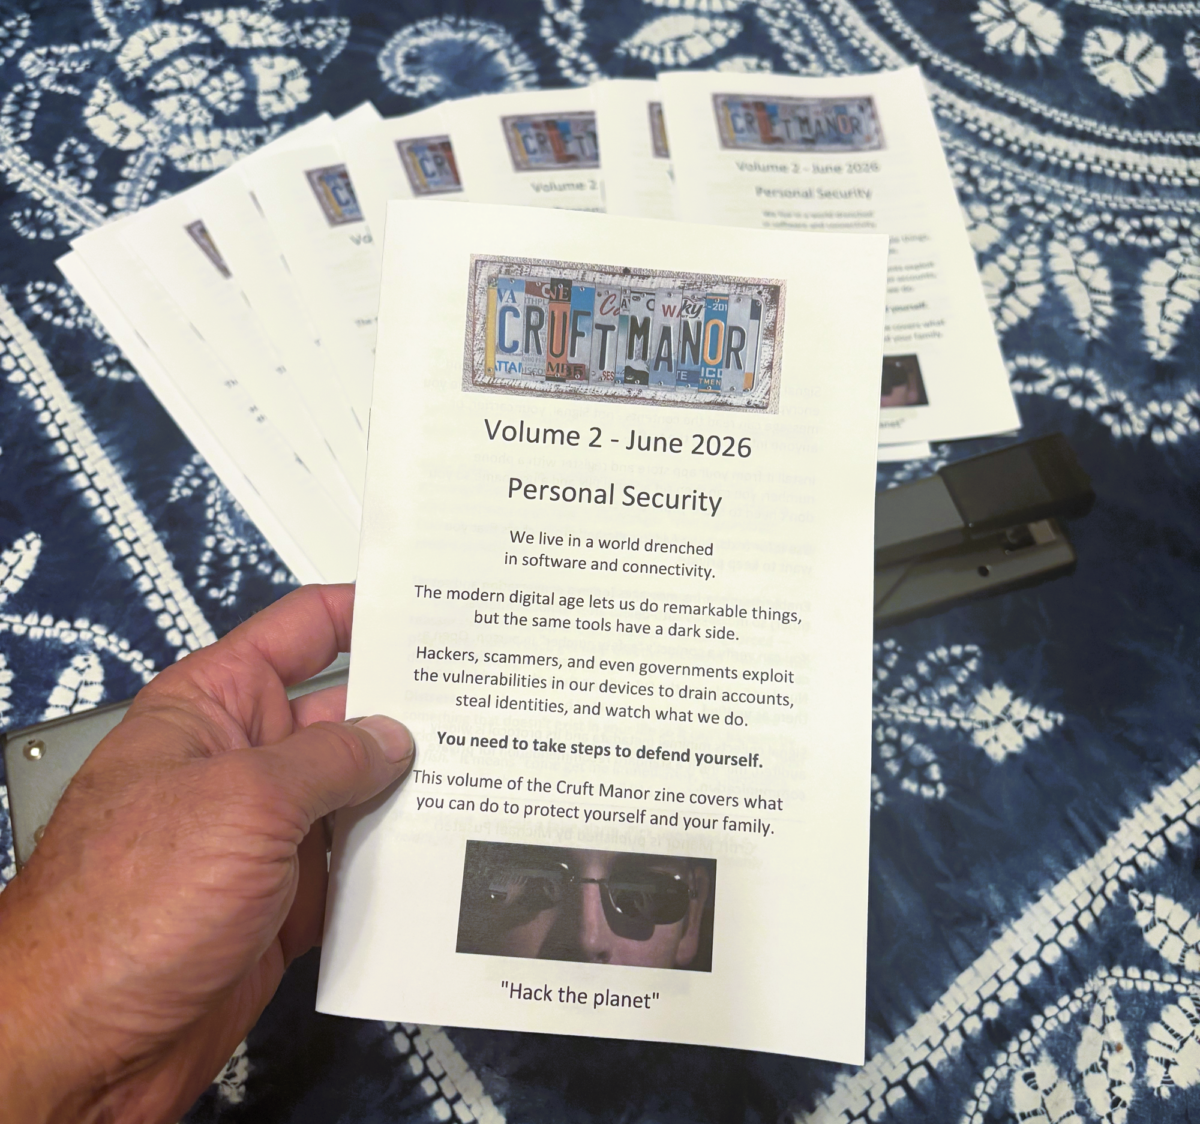
So I built one. I called it Ashlight.
The details
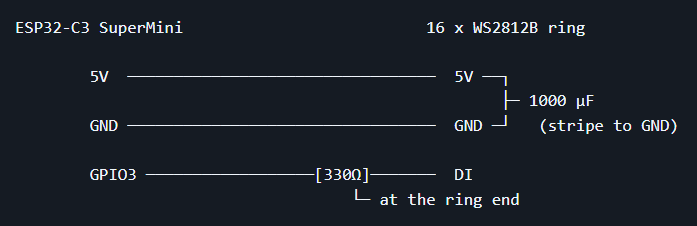
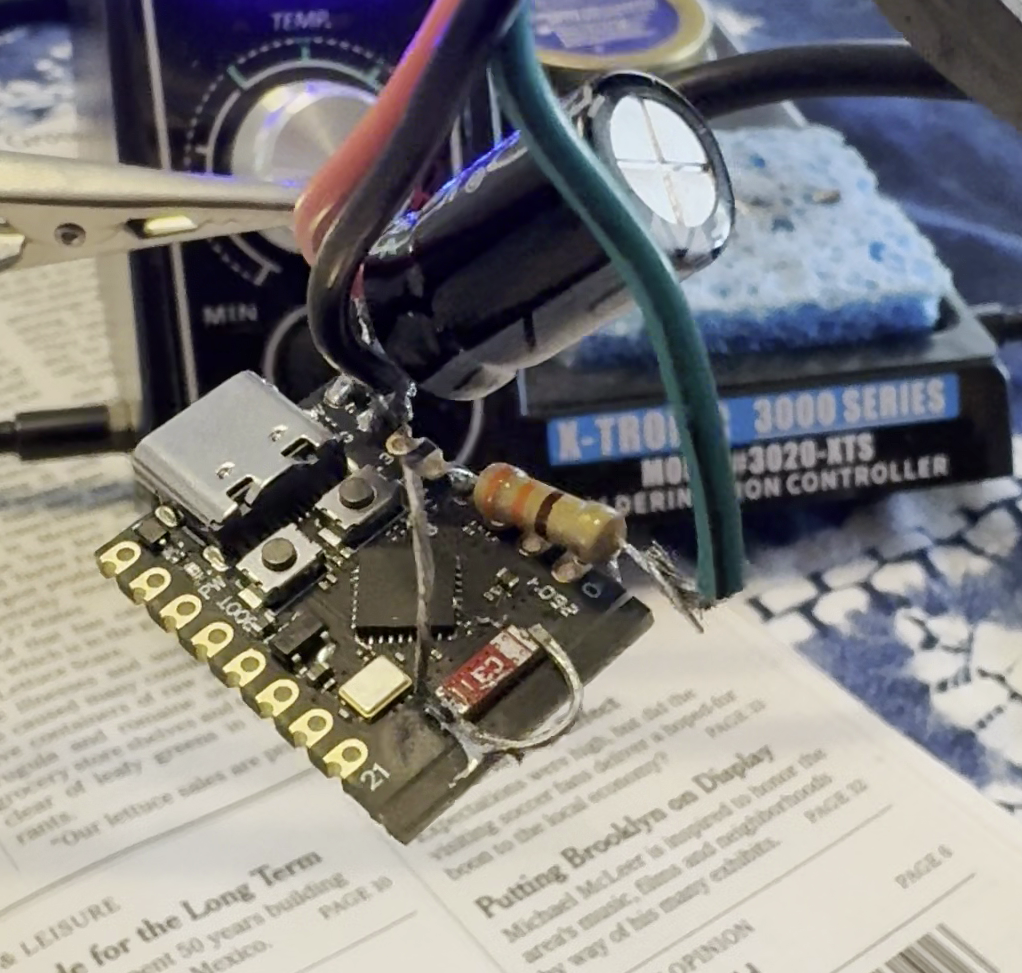
The device is about as simple as it gets, a 16-LED WS2812B ring driven by an ESP32-C3 SuperMini, running ESPHome. It polls the PurpleAir over the home network every few minutes, computes the AQI, and shows the result as a color.
Nothing leaves the house. No cloud service, no API key. The PurpleAir has a local JSON endpoint that’s simple to query.
If the internet goes down, the light keeps working, good for a device whose job is to tell you about a wildfire.
Building it seemed pretty straightforward: Get parts, write a little code, test it, make an enclosure.
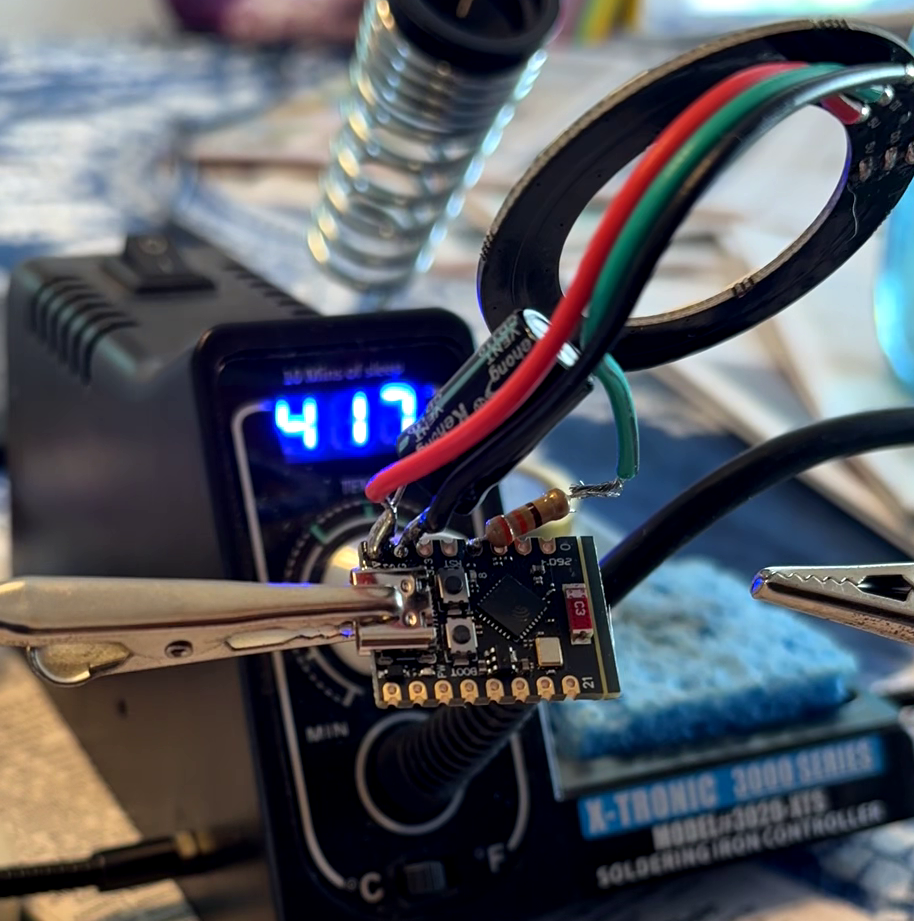
The parts are crazy cheap. The ESP32 was ~$4 and the LED ring was ~$5. A capacitor and resistor for the minimum of circuit board protection.
My soldering is an abomination, mainly because I didn’t want to build it on a breadboard. The resistor and capacitor are just kind of floating in the air.
I leaned on Claude for the coding. After flashing the ESP32 with ESPHome, Home Assistant was able to see it easily.
We made the color a gradient, shifting into the next color as the AQI increased instead of six distinct steps: green -> yellow -> orange -> red -> purple -> maroon. I set it to shift to lowest brightness at night to avoid lighting up the room.
I did learn that the PurpleAir sensor is also running a tiny processor and doesn’t always respond to the HTTP request for JSON. Evidently, when it’s uploading every two minutes to the PurpleAir map, it ignores everything else. The code is set to be OK with this and retry as needed.
After getting it up and running, I found that the ESP32-C3 SuperMini’s onboard wifi antenna is bad. Not marginally bad, bad bad.
The signal strength was so bad the device was unusable when in the dining room.
I was pretty frustrated, but found Peter Neufeld’s blog on adding a small antenna.
The fix is a sweet hack: solder a 31 mm piece of wire to the existing antenna endpoints. 31 mm is a quarter wavelength of the 2.4 GHz wifi signal.
I tinned a wire, bent it into shape, and soldered it onto the ESP32.
Amazingly, it worked with the Ashlight residing in the dining room.
If I were doing this over, I’d get an ESP32 with the U.FL connector for an external antenna and a small flexible patch antenna. Lesson learned.
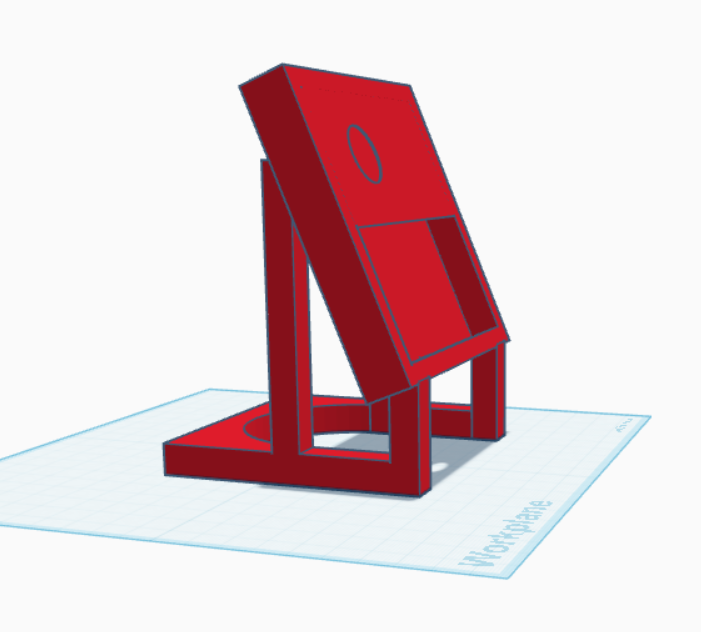
For the enclosure, I couldn’t find something online that fit the bill, so I built something in Tinkercad.

I wanted to use a translucent PLA, but the closest I had on hand was some glow-in-the-dark PLA. A little more finicky to print with, but it ended up working out. It’s a super simple enclosure with a hole for the USB-C cable to bring in power. Here are the STLs I designed.
The lid is just a friction fit, but holds together nicely.
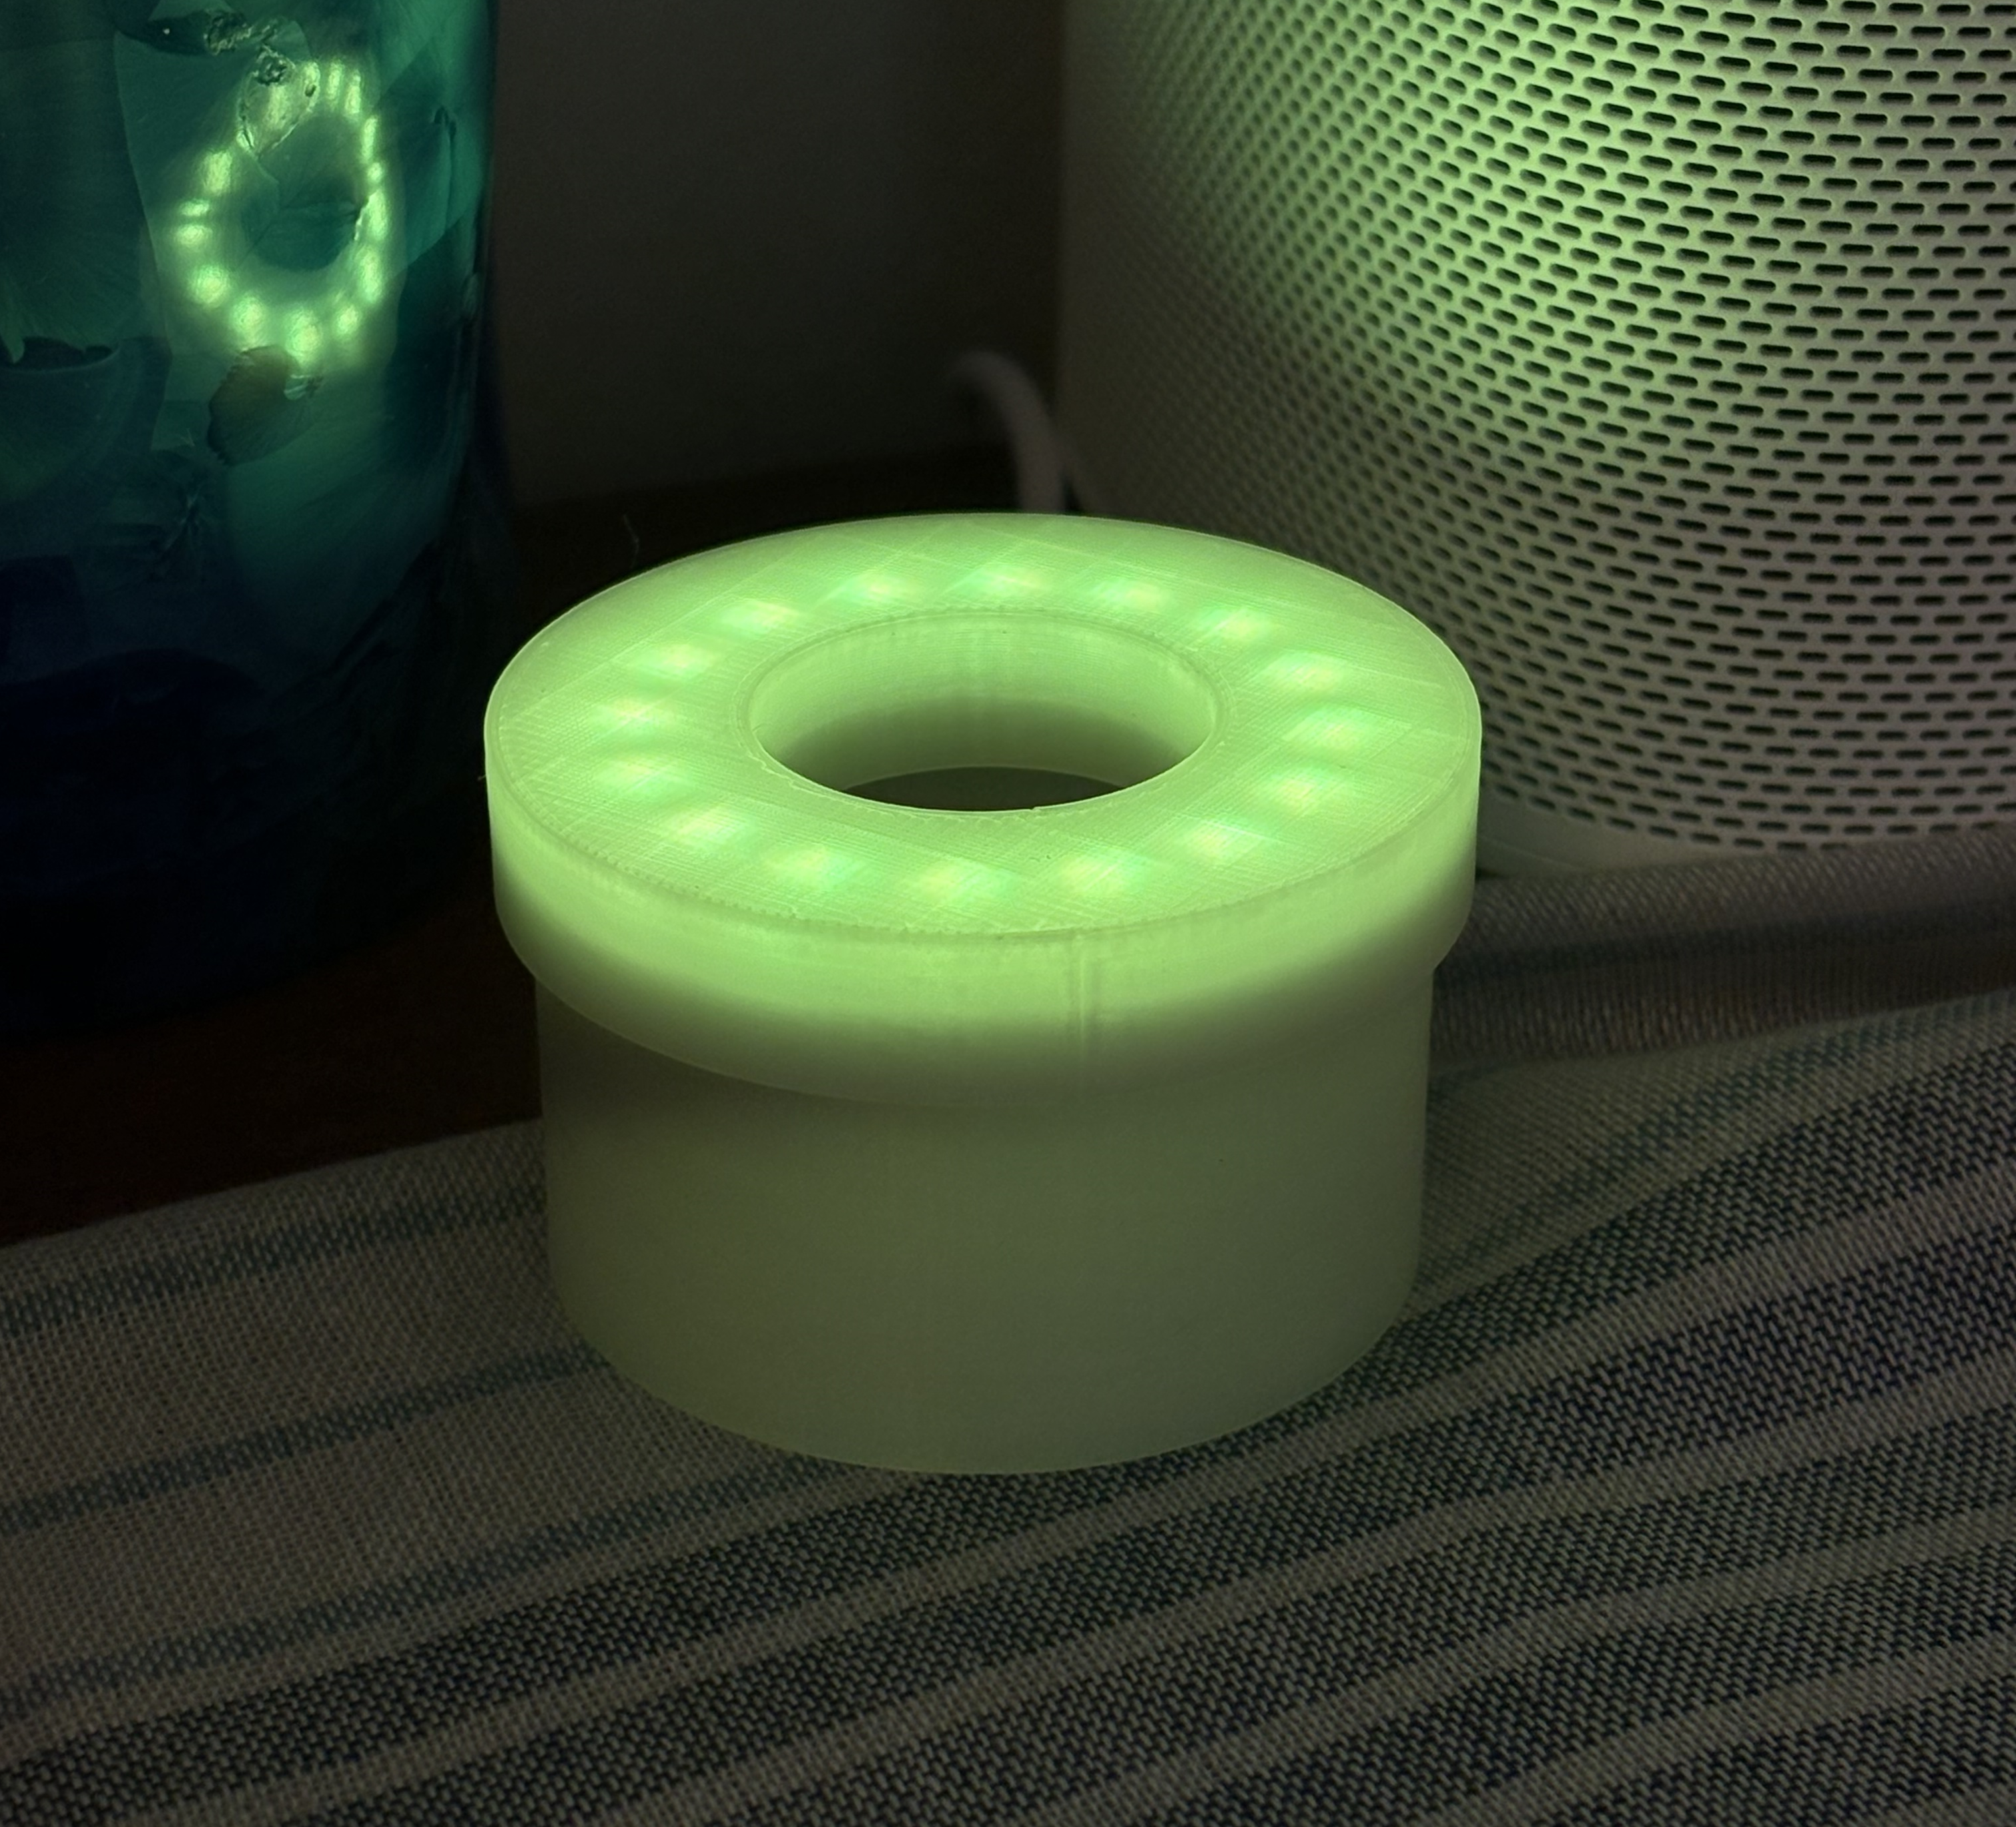
Ashlight is in the dining room, glowing a pale yellow-green. In the morning, Michele and I read the paper and drink coffee there, so it tells us what to expect at a glance.
Here’s a short video about the process.
Code is on GitHub at github.com/cruftbox/ashlight.
The README has the full wiring, AQI math, and considerably more detail than anyone needs but that Claude feels is essential.