I enjoy good gyro meat in sandwiches or in a greek salad. There's a good place near the office (with a surly owner) that makes pretty good stuff. For those that don't know, gyro meat is cooked on a vertical skewer and cooked with radiated heat. As the meat browns, the outer meat is sliced off and served.
One day, my co-worker Yoshi mentioned that Alton Brown of Good Eats had discussed making gyros. I love Alton Brown and if he said it could be done, then I could do it. Yoshi mentioned that his plan kinda sucked because it wasn't cooked by the traditional method of a rotisserie. At that point I decided to build my own gyro cooker.

The first thing I had to solve was how to rotate the meat. On ebay I found a motor made for gas BBQs that looked like it would stand up the usage I intended.

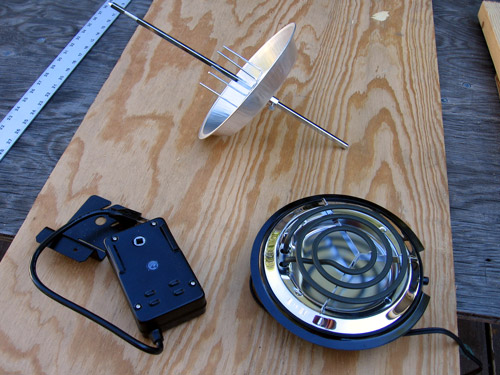
The motor came with a long skewer and meat holder. That it much easier to figure out how to hold the meat. Using a pie plate, I fashioned a a grease catcher. The second item I picked up was a simple electric single burner, similiar to what I used when I built a smoker out of a trashcan.
Click MORE to see the full post.

Rummaging through the garage, I found some leftover plywood and 2x4s. I soon had a plan in place on how to build this thing. This is the mount for the motor.

This is the motor mounted with the skewer and grease catcher in place. Looks good so far.

Now I focused on mounting the burner to the wood. My first mistake was using the cordless drill to drive the screw completely though the back of the burner. The back of the burrner is made of a brittle high temp plastic and it snapped with the force of the motor driven screw.

I used a simple screwdriver to put in three more screws, careful not to break the plastic.

Here is the mounted burner on the plywood and 2x4. The center of gravity went thought the 2x4, so it was stable and didn't tip over.

Here's a first look on how I intended the operations to work. The motor would spin the meat and the burner would heat it. I could raise and lower the meat on the skewer to match the burner. The burner could move closer or further from the meat depending on the temperature I needed.

With the basic construction complete, I needed to prepare the meat. The recipe for gyro meat requires chilling the meat for hours. Gyro meat is basically ground lamb with onion, garlic, and spices. I gathered them all and got out the food processor.

The ingredients ready for the finally 'processing'.

Once the food processor has had it's way with the mixture, it was quite different. Rather than the loose, crumbly nature of ground lamb, this mixture was sticky. It easily held together and I saw how it wouldn't fall off the skewer when I cooked it.

I put the meat mixture on some plastic wrap and shaped it into a cylinder. Suprisingly easy.

Wrapped and ready for a night in the refrigerator.
I then spent the evening playing World of Warcraft and surfing the net.

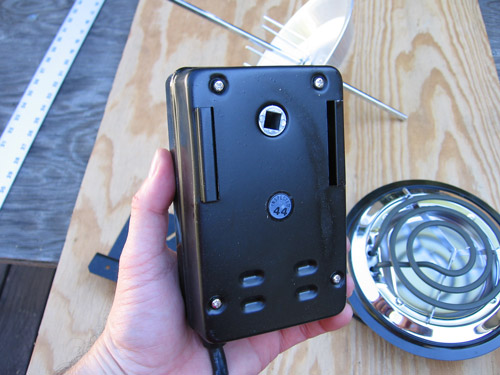
The next morning, I realized I needed a good way to power the motor and burner and built this little distribution box. With a switch and light, it would be useful on other projects as well.

The cooking apparatus was set up and ready to go. Or so I thought.

Getting ready to load the meat, I bent down the prongs on the skewer to make a sort of platform. In hindsight, it would have been better to make a solid bottom for the meat out of a can top or something.

With the meat mounted, I was ready to cook!

Here's the cooker, ready to go. I took this photo and flipped the switch. The motor spun for about 3 seconds and quite. Barely avoiding panic, I flipped the power off and on several times and couldn't get the motor to keep spinning.
Dejected, I put the meat back in the fridge and opened up the motor to look inside. I could see that it was designed to deal with the lateral force of a BBQ trying to torque it at ninety degrees to the rotational axis. It didn't like the full weight being redirected back down the shaft.

I realized that I would have to shed some of the force down the skewer. By getting the skewer for point a bit off of vertical, I was able to get the motor to run with the full weight continuously. College linear mechanics class was still paying off.
Due to the 'handedness' of the motor mount, I had to move the mounting block to a different place on the plywood and basically reverse the cooking arrangement. Thankfully, I had used screws in the construction, so the rework only took a couple of minutes.

Finally, I was able to get the meat skewer loaded into the motor and the motor would rotate. I turned the burner up to full and the gyro began to cook. You can see the angle of the skewer in this image.

The temperature was over 100ยบ F while I was cooking the gyro outside. With nothing left to do but wait, I grabbed a beer and tried to find some shade.
Now these photos don't do my gyro cooker justice, so I shot a little bit of video so you could see and hear it in action. Take a peek at the homemade gyro cooker (1 MB WMV) or (1.5 MB Divx AVI).

After about an hour, I tested the meat temperature and it was around 170ยบ, about 5ยบ over the recommended 165 for lamb. I stopped the motor, moved the burner, and sliced off the first pieces. The meat was actually pretty tasty. The deeper the browning, the better it tasted.

Over time, as meat cooked, I contined to slice the browned outside off. This is where a few extra burners would have been useful. The gyro meat continued to cook for the next couple hours. Good for a restaurant that want's it to last all day, bad for a guy that wants to be in from the summer heat.

When all the meat was cooked I had a nice couple pounds of gyro meat.
Overall, it was fun, but a lot of work. I didn't spend a lot of money, but the project took a long time compared to the ease of smoking meat.
Posted by michael at August 28, 2005 06:41 PM